Pressure transmitter calibration at the bench ensures high accuracy, controlled conditions, and reliable performance compared to field calibration. A pressure transmitter measures the pressure of liquids or gases and converts it into an analog electrical signal such as voltage or current (4–20 mA), representing 0 to 100% of the pressure range.
Over time, transmitters may lose accuracy due to environmental conditions, wear, or drift. This can lead to incorrect readings, affecting process efficiency and overall system performance. Pressure transmitter calibration helps align the instrument output with a known reference standard, ensuring precise and consistent measurements.
In this article, we will explore pressure transmitter calibration, including its importance, required equipment, and the step-by-step procedure for performing bench calibration. We will also discuss the advantages of bench calibration compared to field calibration.
Calibrate the pressure transmitter at the bench
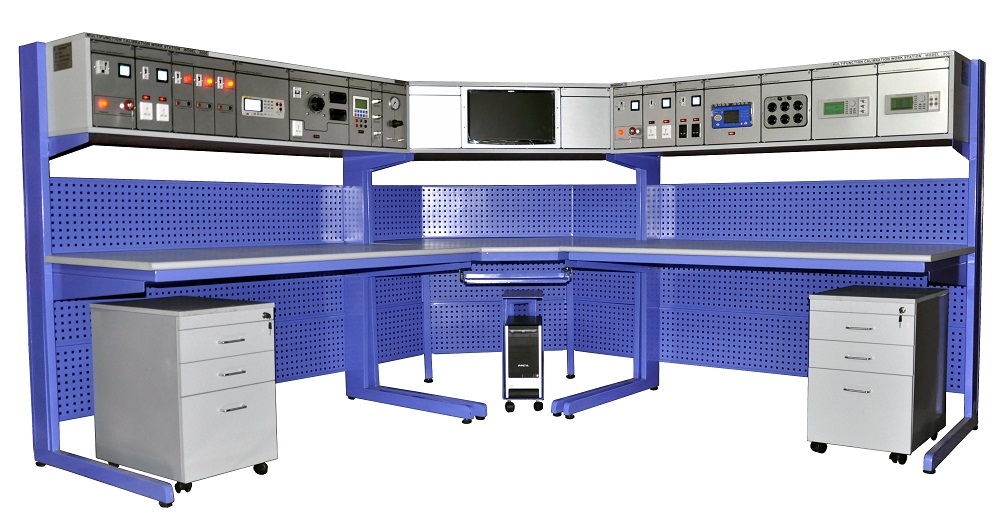
Workstations for the maintenance and calibration of process instrumentation are known as Calibration Test Benches. Most calibration benches have been specially designed and manufactured to suit industrial applications and maintain calibration regulations for the plant’s numerous instruments. Field calibration is frequently performed to ensure performance, but it rarely includes modification to the conventional “actual” value. Bench calibration enables personnel to work as precisely as feasible, as efficiently as possible, and without the performance deterioration that comes with portable field equipment. Before delivery, bench calibration can guarantee that all parts will be in proper operating condition.
Equipment and tools required for pressure transmitter calibration
In order to maintain high performance, pressure transducers used in critical applications need regular calibration. In the event that a transducer drifts out of its specified pressure range, false readings may occur. This may lead to decreased equipment performance and safety hazards. Every three to five years, direct-mounted pressure transmitters on a process undergoing stable conditions need to be calibrated.
A few tools and equipment are required at your bench to perform a pressure transmitter calibration and evaluation. You’ll need the following items:
- The most important piece of the kit, the pressure transmitter, needs to be calibrated.
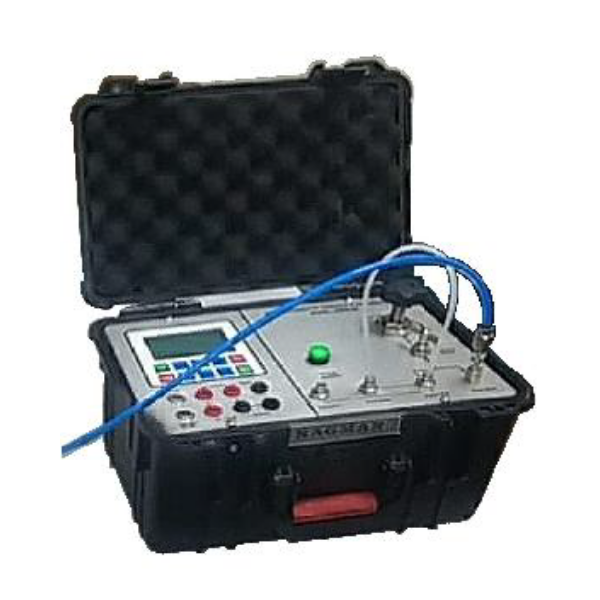
- A calibrator, such as the Nagman Calibration Pneumatic Deadweight Tester, to mimic exact pressure.
- 1 set of test leads for a transmission
- A transmitter test hose
During the installation, testing, and calibration of pressure transmitters, bench calibration provides a steady, ambient environment for calibration, the option to employ the most accurate equipment, and protection from manufacturing circumstances. Even if a circuit breakdown is anticipated, it also gives technicians time and a pristine atmosphere to inspect the transmitter.
Procedure for bench calibration of pressure transmitters
The basic stages for calibrating a pressure transmitter with the P3130 are as follows:
- Connect the calibrator’s transmitter test hose to the transmitter.
- Connect the calibrator’s mA measurement connectors to the transmitter.
- The pressure/vacuum selection knob should be set to the required function.
- Close the supply of the metering valve and the vent knob.
- Hold the pump button down to apply pressure or vacuum, then release it when the desired pressure is attained.
- With the fine pressure adjustment, you may modify the pressure.
The display shows the reference pressure and the transmitter’s current output.
A rep for each of the test points. The test is finished when the measured mA signal at the test locations is confirmed to be within tolerance. If this is not the case, modifications are required.
Using a SMART Transmitter
- You must utilize a HART communicator, link it to the transmitter, and then pick the HART Communicator Menu for lower and higher range value adjustment.
- Basic Setup – Calibration – Zero Trim/Sensor Trim —Value Trims in the Lower and Upper Ranges
- The transmitter will be calibrated automatically by the HART communicator.
- Reestablish the connection between the processes.
- Connect the transmitter to the internet. Make certain there isn’t a leak.
Checking calibration with a Multimeter
When no forces are applied, connect the multimeter to the transmitter and make sure the output is 4ma. Hook up the transmitter to the hand-held tester or test pump i.e pressure source. Make sure there isn’t a breach. Employ pressure ranges of 0%, 50%, 75%, and 100% to see if there is any inaccuracy.


