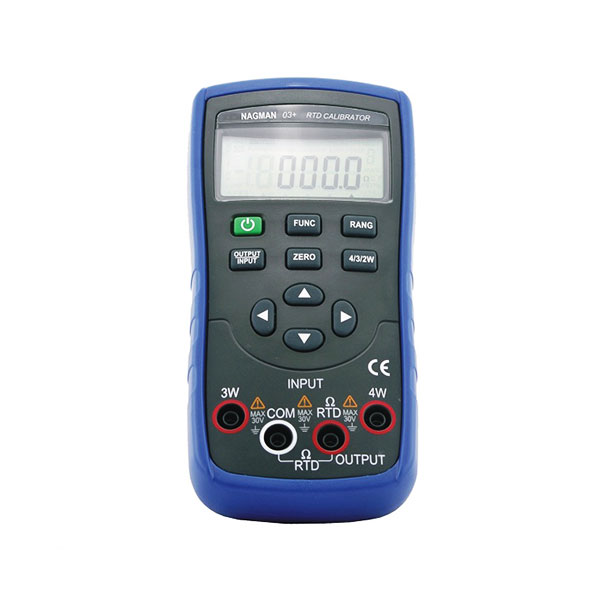
RTDs can be calibrated either by characterization or tolerance testing, which are considered calibration processes. The way the UUT will be used and the level of precision that the user requires will dictate the kind of calibration that has to be performed. In laboratory settings, performing the appropriate RTD temperature sensor calibration is essential to meet client specifications. You will need an RTD calibrator no matter what process you choose.
RTD Calibration Process: Characterization
Characterization is the process. A brand-new resistance vs. temperature relationship is calculated from scratch every time a calibration is performed using this procedure. In most cases, the outcome of this kind of calibration is a whole new set of coefficients in addition to a calibration table. These deliverables are delivered as a result of the calibration.
The following is a rundown of the five fundamental measures that need to be taken. Some interpretations of the method simplify it by combining or skipping some of the phases in the process.
Probe Placement
Instabilities and gradients may be found in any source of temperature. These factors contribute to the existence of calibration mistakes and/or uncertainty. It is recommended that the probes be put as near to one another as possible to reduce the impacts. When calibrating in baths, the probes to be measured should be arranged in a radial arrangement. With the reference probe positioned at the center of the circle. This guarantees that the distance between the reference probe and each of the UUTs will be the same.
Readout Connection
This stage doesn’t need much thought. The connections must be secure and in the appropriate arrangement of two, three, or four wires. If you are utilizing a 4-wire arrangement, check to see that the current and voltage connections are right.
Temperature and Reference Prob Determination Measurement
The first and most accurate way is the use of readouts that are specifically developed for temperature work. After the resistance has been measured, the temperature may be computed using the previously input coefficients into the readout. After these coefficients have been input, the readout will indicate the current temperature using the appropriate units, and the computations for the temperature will be done internally.
Unit Under Test Measurement
Since the UUTs are like the reference probe, they are measured in a way analogous to how the probe is measured. If many UUTs need to be calibrated with an RTD calibrator simultaneously, you need to ensure adequate time for self-healing to take place when they are turned on before the data is collected.
Make sure that the readout is set to the appropriate range to give the right source current and avoid any range variations that may occur when comparing measurements taken at various temperatures. In most cases, the measurements are carried out by beginning at the temperature of calibration that is the highest and continuing downward.
Thermometer Calibration with an RTD Calibrator
The process of fitting data is straightforward in theory but may be difficult in reality. In the most basic form, it is a procedure that consists of solving a set of simultaneous equations that include the calibration data in order to arrive at a set of coefficients that are particular to the PRT and the calibration. Several commercially accessible software packages and equipment have been developed, especially to do this job.
Some of them are restricted in their functionality and can only solve the most fundamental temperature functions. Some others are more adaptable and include choices for the number and position of calibration points as well as analyses concerning the accuracy of the final fit. The second kind of equipment, like Nagman 03, is the one that is recommended.
RTD Calibration Process: Tolerance Testing
PRT calibrations that include tolerance testing are only used for applications that need a low level of precision. In this method of calibration, the resistance of the UUT is evaluated with predetermined values at various operating temperatures. One of the standard models, such as the ASTM 1137 curve, is used to specify the values used.
PRTs that have been calibrated in this manner are often used in applications with a more industrial flavour, where the readout is not able to take individual coefficients but is pre-programmed with a standard PRT curve. It is necessary to conduct tests on the probe to determine whether or not it complies with the curve of interest. Some accuracy classes have been specified, and probes are designed to fit inside those classes.
Conclusion
The steps for calibrating a Platinum Resistance Thermometer and RTD calibrator are the same regardless of whether one chooses to do tolerance testing or characterization.
To evaluate the tolerance status with certainty, it is essential to utilize testing equipment like Nagman 03 and techniques with a degree of precision that is enough to meet the required standard.


